How to true a bike wheel
A workshop walk-through for bringing a wheel back into true — lateral, radial, dish, and tension — plus the call on when a wheel is past saving.

On this page
A wheel goes out of true gradually. Spokes ease their tension a quarter-turn at a time as the wheel rolls; the rim absorbs an unseen pothole hit; a replaced spoke pulls slightly harder than the rest of the bed. By the time the brake pad starts kissing the rim on a road bike, or the rotor starts ticking the caliper on a disc bike, the wheel has been drifting for weeks.
Truing is the work of reversing that drift. It is one of the few jobs where the tool you reach for is the tool that does the work; your hands set the spokes, the truing stand and the tension meter tell you whether you set them right. Done well, a true wheel is the cheapest performance upgrade on the bike. Done in a hurry, you can drag the whole wheel further out of round than it was when it went on the stand.
This guide walks the workshop sequence: how to read the wheel, lateral and radial true, dish, tension balance, and the call on when a wheel is past saving.
What “true” actually means
A bicycle wheel is true when four properties hold together:
- Lateral true. The rim runs side to side without weaving. Stationary references like a brake pad or the stand's caliper jaws sit close to the rim sidewall without rubbing through a full rotation.
- Radial true. The rim runs round without rising and falling. The same calipers, set against the rim's outer face, stay at a constant distance from the hub axis as the wheel spins.
- Dish. The rim is centered between the two locknut faces of the hub. On a rear wheel with a cassette, this is asymmetric work; on a front wheel it's almost symmetric. A wheel that's true side-to-side but dished off-center will steer the bike awkwardly and brake unevenly.
- Even tension. Every spoke on a given side of the wheel pulls within a working band of every other spoke on that side. A wheel can pass the first three tests and still fail this one; under load it'll go right back out of true within a week of riding.
The four properties interlock. Lower a single spoke's tension to nudge lateral true, and you've changed the radial profile and the dish at the same time. The mechanic's discipline is to make small adjustments and re-read all four after each one, not to chase a single dimension on its own.
The tools that do this work
A first-class truing job uses a workshop tied together by a few tools.
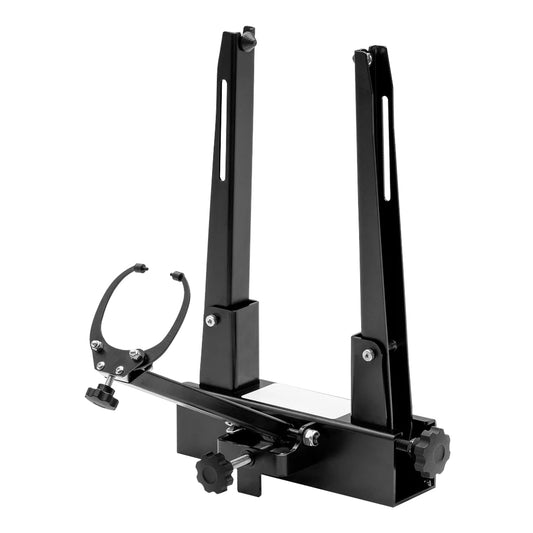
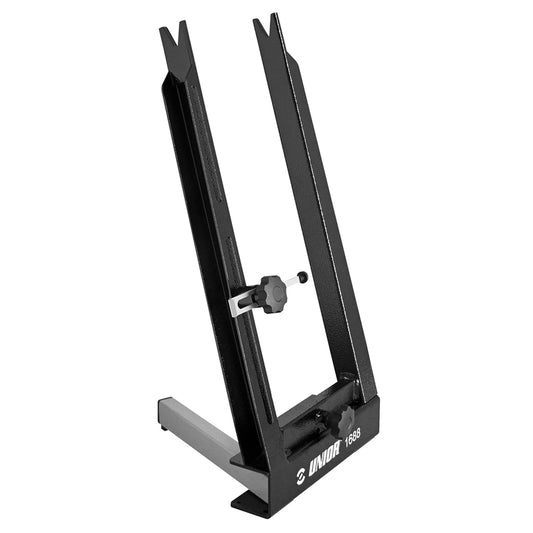
The reference at the center of the bench is the Pro Truing Stand 1689. It takes 16 to 29+ inch wheels, hubs up to 197 mm with the included magnetic thru-axle adapters or 230 mm without, and bolts to the bench through 8 mm holes at 268 mm center-to-center. For event support and travel, the Portable Truing Stand 1688 covers the same wheel range in a 2.3 kg package whose lower support leg folds into the base. The Portable accepts the same accessories as the Pro Stand, including the Rotor Truing Gauge 1689.2 for disc-brake work.
For tension measurement, the Spoke Tension Meter 2.0 is the upgrade with bearing contact points at the spoke and a calibration stick included with every unit. The Spoke Tension Meter 1752/2 is the proven previous-generation gauge that still reads true straight out of its protected carrying case. Both convert their dial reading to kilogram-force through the Unior Wheel Tension App and its printable tension sheet.
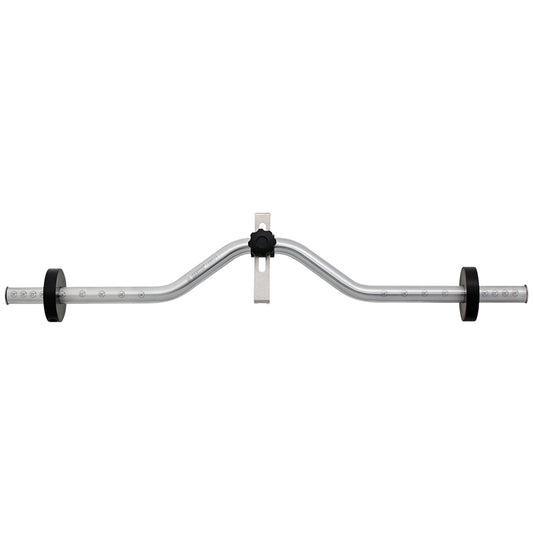
The Wheel Dishing Tool 1690/1 reads centering on 16 to 29 inch rims with the tire still mounted; the donuts at either end ride on the tire shoulder, so you don't strip the bike down twice.
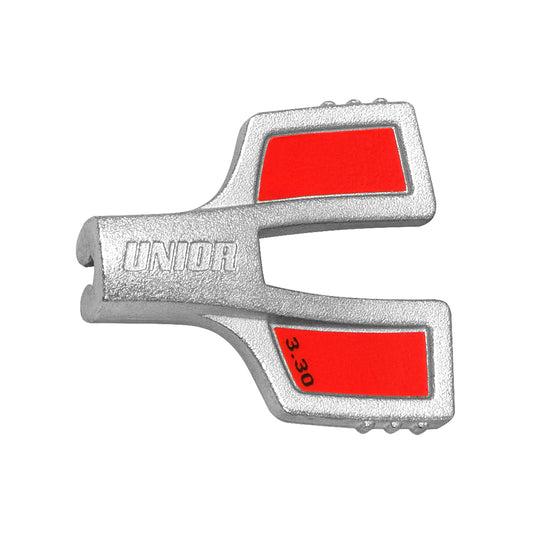
Spoke wrenches get sized to the nipples on the wheel in front of you. The Professional Spoke Wrench 3.45mm and Professional Spoke Wrench 3.3mm use a four-flat engagement that won't round a nipple on the first hard turn. The Tx20 Professional Spoke Wrench covers Torx-recess nipples; the DT Swiss T20 Squorx Spoke Wrench covers DT's double-sided Squorx system; the Mavic 6.4mm Spoke Wrench 1635 covers Mavic's 6.4 mm nipples and UST rim inserts. A double-sided variant covers two less-common sizes side by side: the Double Sided Spoke Wrench 3.3 x 3.45mm 1633/2P is the everyday road and gravel pair. For wheels with bladed spokes, the Aero/Bladed Spoke Holder 1632 prevents windup as the nipple turns.
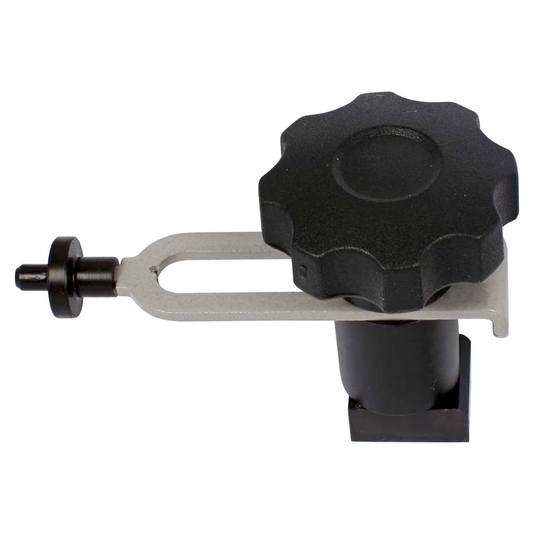
For roadside or travel work, the Pocket Wheel Truing Tool 1753/6 straps to a seatstay or chainstay and indicates the rim's wobble against a fixed reference, which is the trail-side answer to “the brake pad used to do this on rim brakes.”
For deeper builds, the Master Wheel Building Kit 1754 bundles 19 wheel-specific tools in a foam-cut workshop case. The Nipple Insertion Tool 1751/2T and the Nipple Driver 1751/2 handle the from-zero work of seating nipples through a double-wall rim and bringing every spoke to the same starting depth.
Reading the wheel
Mount the wheel on the truing stand. Anchor the hub axle in the stand's clamp; on a thru-axle hub, drop the included magnetic adapter onto the axle V and snug the bolt. Spin the wheel by hand and watch.
Bring the lateral calipers in toward the rim sidewall, one click at a time, until the worst high point taps the caliper jaw on each side. That tap is the loud spot: the largest lateral deviation. The rim's other lateral excursions come into view as the calipers tighten further; a true wheel passes through the calipers' working range with no contact.
Repeat the operation with the radial caliper set against the rim's outer face. Look for the tall and the short. The wheel sits on these two coordinates, lateral and radial, and your hands work them together.
Lateral true: side-to-side
Spokes pull the rim toward the hub flange they anchor on. On a dished rear wheel, the drive-side flange is further inboard than the non-drive flange, so drive-side spokes run at higher tension; on a front wheel with disc, the disc-side spokes carry the higher load. The principle: tightening a spoke pulls the rim toward its anchor flange; loosening releases it.
To move a rim segment to the right by 1 mm, find a spoke whose nipple is on the right side of the wheel near the deviation and tighten it. A quarter-turn of the Professional Spoke Wrench 3.45mm, or whichever wrench fits the nipple, moves the rim a measurable amount in that direction. To move the rim by 0.5 mm, half that. Better to make two passes of small adjustments than one big one; small adjustments leave time to re-read the lateral, radial, and dish dimensions between changes.
The pattern: tighten a right-side spoke to move the rim right; loosen a left-side spoke to release it leftward, then tighten the next right-side spoke. Spread the work over two or three spokes around the deviation, not one. Working a single spoke makes a steep tension hill that'll spring back the moment the wheel sees a bump.
Radial true: round
Radial deviations show up as the calipers track the rim's outer face. A high spot means the rim is bulging outward; a low spot means it's pulled inward toward the hub.
To pull a high spot inward, tighten the spokes whose anchors lie near the deviation on both sides of the wheel evenly, pulling both flanges toward the hub axis at that point. To push a low spot outward, loosen the same spokes evenly. The principle is symmetric: radial work uses the spokes on both sides at once, not one side preferentially.
The discipline is to keep the lateral work and the radial work from undoing each other. After every radial move, re-check the lateral calipers; after every lateral move, re-check the radial.
Dish: centering
Once the wheel runs true laterally and radially, lift it off the stand and onto the Wheel Dishing Tool 1690/1. Set the dishing gauge against the rim with the central point indexing on the hub locknut face. Flip the wheel and set it against the rim on the other side. If the gauge reads the same offset on both sides, the rim is centered between the locknuts. If one side is closer than the other, you'll move the rim toward the wider side by tightening that side's spokes a fraction of a turn each, then re-check.
Some rim and hub combinations are intentionally dished asymmetrically. Uncommon, but a hub with an unusual flange geometry or a rim with a deliberately offset spoke bed will read off-center even when correct. If that's the wheel on the stand, you'd already know.
Tension balance
This is the step that separates a wheel that's true today from one that's still true next month. Pass the Spoke Tension Meter 2.0 over each spoke on the same side of the wheel and read every value off the dial. The drive-side and disc-side spokes will read higher than their counterparts on the non-drive or non-disc side; that's the dish working. What matters is that within each side, the spokes read inside a working band. Our mechanics aim for spokes on the same side to fall within about 10–15% of each other on a road wheel and 15–20% on an MTB wheel under load.
Where a spoke reads low compared to its side-mates, give it a fraction of a turn tighter and re-check. Where one reads high, ease it back. Use the Unior Wheel Tension App to convert dial readings to kilogram-force; print the tension sheet and write the per-spoke values on it if you want a record of where the wheel sat the day you built it.
A wheel that passes all four dimensions (lateral, radial, dish, balanced tension) will hold its true for a long time under normal use.
When the wheel is past saving
Truing extends a wheel's life; it doesn't restore one that's hit its end.
A rim with a crack near a spoke hole is done; a crack near a stress riser will propagate. We replace the rim and re-lace. A rim with a flat spot that doesn't come out when tension is dropped on the surrounding spokes has plastically deformed and will not return to true. A hub with broken pawls, axle play that doesn't resolve with cone adjustment, or a flange that's started cracking around the spoke holes is at the end of its working life.
The other limit is spoke fatigue. If three or more spokes on the same wheel have broken in the past season, the rest of the spokes are likely close behind. A new spoke set is straightforward; a wheel that's losing spokes randomly is asking to be rebuilt with new spokes, possibly a new rim too.
Knowing when to retire a wheel is its own skill. The cost of a re-laced wheel is most of the way to a new factory wheelset, and the labor is the same either way. The judgement call lives in the spoke-fatigue history and the rim condition, not in how far out of true the wheel is on the stand.
Built in Zreče, Slovenia
Unior has been forging hand tools in Zreče, Slovenia, since 1919, and is the official technical partner of multiple World Tour and downhill teams. Our wheelbuilding catalog reflects the same in-house manufacturing as the chain-tool and brake-tool families: the Pro Truing Stand 1689's calibrated bearings, the Wheel Dishing Tool 1690/1's tire-shoulder donuts, and the Spoke Tension Meter 2.0's factory-supplied calibration stick are all part of a wheelbuilding workflow we use ourselves on the bench.
Pro tip from our mechanics
Build the wheel once and walk away from it before final tensioning. A wheel that's true at finish-of-build but hasn't been stress-relieved (squeezing each parallel spoke pair in your hands to settle the spokes into their flange holes) will go out of true on the first hard ride. After every build, we set the wheel on the bench, push the spokes through the working range a few times, re-check tension, and re-true. The wheel you ride away on is not the wheel you finished building twenty minutes earlier.
Tools used in this guide
Straight from the article — no hunting through the catalog.
-
Pro Truing Stand
Regular price $399.99 USDRegular priceUnit price per -
Portable Truing Stand
Regular price $189.99 USDRegular priceUnit price per -
Spoke Tension Meter 2.0
Regular price $119.99 USDRegular priceUnit price per -
Wheel Dishing Tool
Regular price $79.99 USDRegular priceUnit price per -
 Sold out
Professional Spoke Wrench 3.45mm
Regular price $22.99 USDRegular priceUnit price per -
Professional Spoke Wrench 3.3mm
Regular price $9.99 USDRegular priceUnit price per -
Professional Spoke Wrench Tx20
Regular price $9.99 USDRegular priceUnit price per -
Rotor Truing Gauge
Regular price $29.99 USDRegular priceUnit price per